
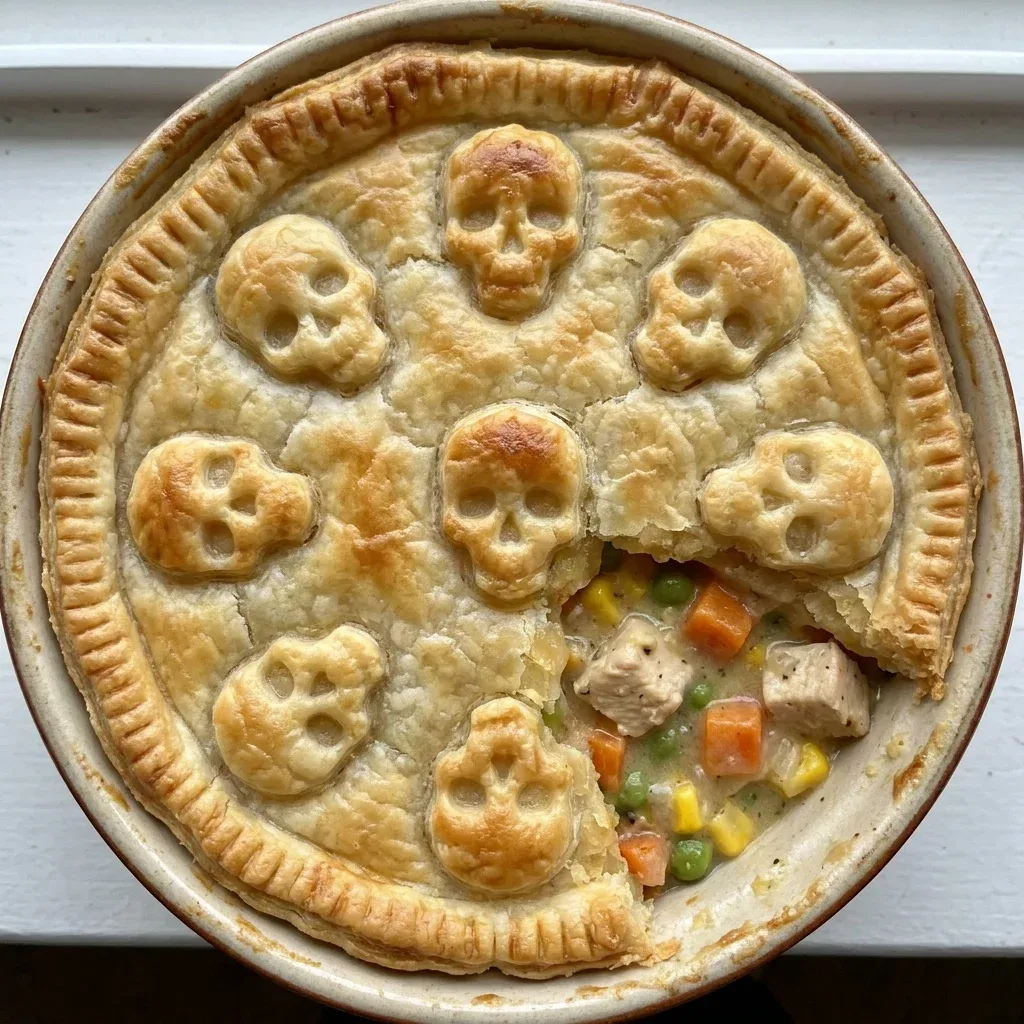
These Skull Chicken Pot Pies bring a spooky yet comforting touch to your family dinner table. They feature a rich, creamy center packed with tender chicken and vibrant vegetables. Every bite offers a perfect balance of savory gravy and flaky, golden-brown crust.
My kids absolutely adore the playful skull designs on top, making mealtime an exciting adventure. You can easily whip these up on a busy weeknight using wholesome ingredients from your pantry. Making Skull Chicken Pot Pies is a wonderful way to show your family that food is truly love. This recipe nourishes the body while bringing smiles to the faces of your favorite people.
Why You’ll Love This Recipe
- Nutrient-Dense Ingredients: This dish incorporates fresh carrots, peas, and celery to provide essential vitamins and minerals for your growing children.
- Kid-Approved Design: The unique look of Skull Chicken Pot Pies encourages even the pickiest eaters to finish their vegetables with joy.
- Simple Preparation: You can use leftover rotisserie chicken to save time without sacrificing the homemade taste your family craves.
- Customizable Comfort: This recipe adapts easily to whatever seasonal vegetables you have in your crisper drawer.
Ingredients You’ll Need
Quality ingredients make all the difference when you are cooking for those you love. I always recommend using organic vegetables and pasture-raised chicken whenever possible to ensure the most nourishment. For these Skull Chicken Pot Pies, the crust serves as your canvas, so choosing a high-quality refrigerated or homemade dough is vital for that perfect crunch.
| Ingredient | Amount |
|---|---|
| Cooked Chicken Breast (shredded or cubed) | 3 cups |
| Mixed Vegetables (peas, carrots, corn) | 2 cups |
| Unsalted Butter | 1/4 cup |
| All-Purpose Flour | 1/3 cup |
| Yellow Onion (diced) | 1/2 cup |
| Chicken Broth (low sodium) | 2 cups |
| Heavy Cream or Whole Milk | 1/2 cup |
| Dried Thyme and Rosemary | 1 teaspoon each |
| Salt and Black Pepper | To taste |
| Refrigerated Pie Crusts | 2 sheets |
| Egg (for egg wash) | 1 large |
Substitutions & Variations
If you want to make these Skull Chicken Pot Pies even healthier, you can easily swap a few ingredients. Instead of using heavy cream, try substituting it with plain Greek yogurt for a protein boost and a tangy finish. You can also replace the all-purpose flour with a gluten-free flour blend if your family has sensitivities.
For a dairy-free version, use olive oil instead of butter and full-fat coconut milk instead of dairy cream. Furthermore, you can swap the chicken for chickpeas or extra mushrooms to create a delicious vegetarian version of this festive meal. Always remember that the best recipes are the ones that work for your specific family needs.
For a healthier twist on your Skull Chicken Pot Pies, consider using plain Greek yogurt instead of heavy cream for added protein. You might also enjoy these vibrant Caprese Skewers with Balsamic Glaze as a refreshing side.
Step-by-Step Instructions
- Preheat your oven to 400°F (200°C) and lightly grease four to six oven-safe ramekins.
- In a large skillet over medium heat, melt the butter and sauté the diced onions until they become translucent and fragrant.
- Whisk in the flour and cook for about one minute to remove the raw flour taste, then slowly pour in the chicken broth while whisking constantly.
- Add the chicken, mixed vegetables, herbs, and cream to the skillet, allowing the mixture to simmer until it thickens into a luscious gravy for your Skull Chicken Pot Pies.
- Taste the filling and adjust the seasoning with salt and pepper before spooning the mixture into your prepared ramekins.
- Roll out your pie crust and cut out circles slightly larger than the diameter of your ramekins to top your Skull Chicken Pot Pies.
- Use a small paring knife or a straw to cut out two eyes and a triangular nose on each crust circle to create the skull face.
- Place the crusts over the ramekins, press the edges to seal, and brush the tops with a beaten egg for a beautiful shine.
- Bake for 20 to 25 minutes or until the crust turns a deep golden brown and the filling bubbles through the skull openings.
Pro Tips for Success
- Cold Dough is Key: Keep your pie crust in the refrigerator until the very moment you are ready to cut the skull shapes. Cold fat in the dough creates those sought-after flaky layers.
- Don’t Overfill: Leave about half an inch of space at the top of your ramekins when adding the filling for Skull Chicken Pot Pies. This prevents the gravy from boiling over and ruining the skull design.
- Sharp Tools: Use a very sharp knife or even a clean pair of kitchen shears to cut the facial features. Clean cuts look much better after the dough expands in the heat of the oven.
- Ventilation: The skull facial features naturally act as vents, but make sure the “mouth” or “eyes” are large enough to let steam escape effectively.
- Resting Time: Let your Skull Chicken Pot Pies sit for five to ten minutes after removing them from the oven. This allows the sauce to set so it does not run everywhere when you dive in.
Achieving the perfect pie crust is crucial for your Skull Chicken Pot Pies. To elevate your dinner experience, try pairing this dish with a delicious Hoisin Chicken Stir Fry for a flavorful combination.
Storage & Reheating Tips
You can store any leftover Skull Chicken Pot Pies in the refrigerator for up to three days. Simply cover the ramekins tightly with aluminum foil or plastic wrap once they have cooled completely. When you are ready to enjoy them again, I recommend using the oven rather than the microwave.
Reheating at 350°F for about 15 minutes will help maintain the crispness of the crust. If you want to freeze them, you can assemble the pies without baking and keep them in the freezer for up to two months. Just bake them directly from frozen, adding an extra 10 to 15 minutes to the total cooking time.
What to Serve With This Recipe
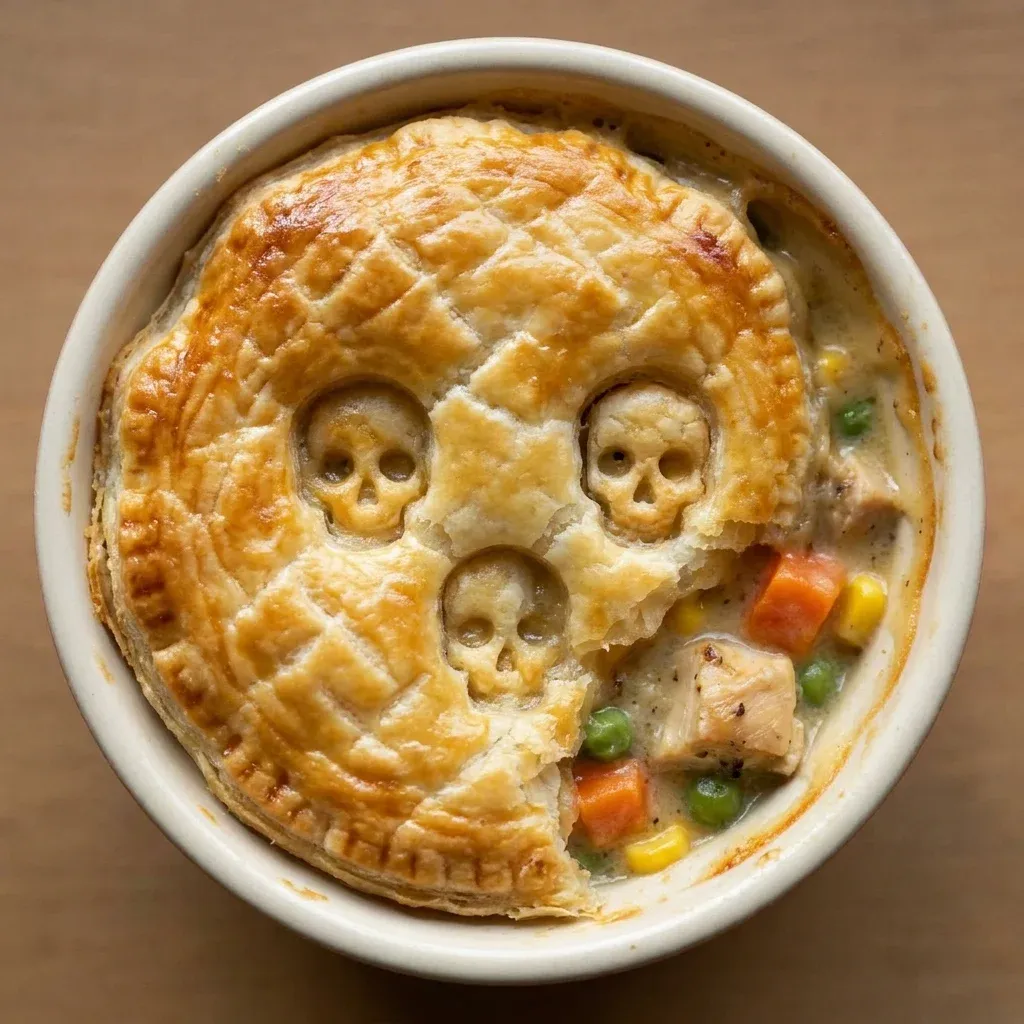
Since Skull Chicken Pot Pies are quite hearty and rich, I love pairing them with light, refreshing sides. A simple garden salad with a lemon vinaigrette provides a nice acidic contrast to the creamy gravy. You could also serve a side of roasted balsamic Brussels sprouts or steamed broccoli to add more greens to the plate.
For a truly autumnal feel, a bowl of sliced apples or a light cranberry relish complements the savory herbs perfectly. These pairings ensure your meal remains balanced and nourishing for everyone at the table.
To balance the richness of Skull Chicken Pot Pies, light sides work wonderfully. For a lovely dessert complement, try creating Bunny Oreo Balls, which add a playful touch and sweetness to your meal.
FAQs
Can I use puff pastry instead of pie crust?
Yes, you can certainly use puff pastry for your Skull Chicken Pot Pies. It will result in a much taller, airier top that is incredibly buttery. Just be aware that puff pastry rises significantly, so your skull features might look a little more “abstract” after baking. It is a delicious variation that many kids actually prefer because of the light texture.
Can I make the filling in advance?
Absolutely! You can prepare the chicken and vegetable filling for your Skull Chicken Pot Pies up to 24 hours in advance. Keep it in a sealed container in the fridge.
When you are ready to eat, just fill the ramekins, add the crust, and bake. This makes the recipe even more convenient for those hectic weeknights when you are running between soccer practice and homework.
How do I prevent the crust from getting soggy?
To prevent a soggy crust on your Skull Chicken Pot Pies, ensure your filling is thick and not too watery. The flour and butter roux is essential for this. Additionally, making sure the filling is not piping hot when you put the cold dough on top can help. The egg wash also creates a slight barrier and helps the crust crisp up quickly in the high heat of the oven.
Skull Chicken Pot Pies offer a unique culinary experience, blending playful designs with hearty ingredients that delight families. Discover more about the history of savory pies and their variations in this culinary exploration.
Nutrition Information (per serving)
The following values are estimates based on one individual pot pie serving. These Skull Chicken Pot Pies provide a great balance of protein, carbohydrates, and healthy fats to keep your family fueled and satisfied.
| Nutrient | Amount |
|---|---|
| Calories | 450 kcal |
| Total Fat | 24g |
| Saturated Fat | 12g |
| Cholesterol | 85mg |
| Sodium | 620mg |
| Total Carbohydrates | 38g |
| Dietary Fiber | 3g |
| Sugars | 4g |
| Protein | 22g |

Skull Chicken Pot Pies
- Total Time: 45 mins
- Yield: 4 servings 1x
- Diet: Gluten Free
Description
These Skull Chicken Pot Pies bring a spooky yet comforting touch to your family dinner table. They feature a rich, creamy center packed with tender chicken and vibrant vegetables. Every bite offers a perfect balance of savory gravy and flaky, golden-brown crust. My kids absolutely adore the playful skull designs on top, making mealtime an exciting adventure.
Ingredients
3 cups Cooked Chicken Breast (shredded or cubed)
2 cups Mixed Vegetables (peas, carrots, corn)
1/4 cup Unsalted Butter
1/3 cup All-Purpose Flour
1/2 cup Yellow Onion (diced)
2 cups Chicken Broth (low sodium)
1/2 cup Heavy Cream or Whole Milk
1 teaspoon Dried Thyme
1 teaspoon Dried Rosemary
Salt and Black Pepper to taste
2 sheets Refrigerated Pie Crusts
1 large Egg (for egg wash)
Instructions
- Preheat your oven to 400°F (200°C) and lightly grease four to six oven-safe ramekins
- In a large skillet over medium heat, melt the butter and sauté the diced onions until they become translucent and fragrant
- Whisk in the flour and cook for about one minute to remove the raw flour taste, then slowly pour in the chicken broth while whisking constantly
- Add the chicken, mixed vegetables, herbs, and cream to the skillet, allowing the mixture to simmer until it thickens into a luscious gravy
- Taste the filling and adjust the seasoning with salt and pepper before spooning the mixture into your prepared ramekins
- Roll out your pie crust and cut out circles slightly larger than the diameter of your ramekins to top your pies
- Use a small paring knife to cut out two eyes and a triangular nose on each crust circle
- Place the crusts over the ramekins, press the edges to seal, and brush the tops with a beaten egg
- Bake for 20 to 25 minutes or until the crust turns a deep golden brown and the filling bubbles through the openings
Notes
Keep your pie crust in the refrigerator until ready to cut for flaky layers.
Leave half an inch of space at the top of your ramekins to prevent overflow.
Sharp tools help cut better facial features on the crust.
- Prep Time: 20 mins
- Cook Time: 25 mins
- Category: Dinner
- Method: Baking
- Cuisine: American
Nutrition
- Serving Size: 1 bowl
- Calories: 450 kcal
- Sugar: 4g
- Sodium: 620mg
- Fat: 24g
- Saturated Fat: 12g
- Unsaturated Fat: N/A
- Trans Fat: N/A
- Carbohydrates: 38g
- Fiber: 3g
- Protein: 22g
- Cholesterol: 85mg