
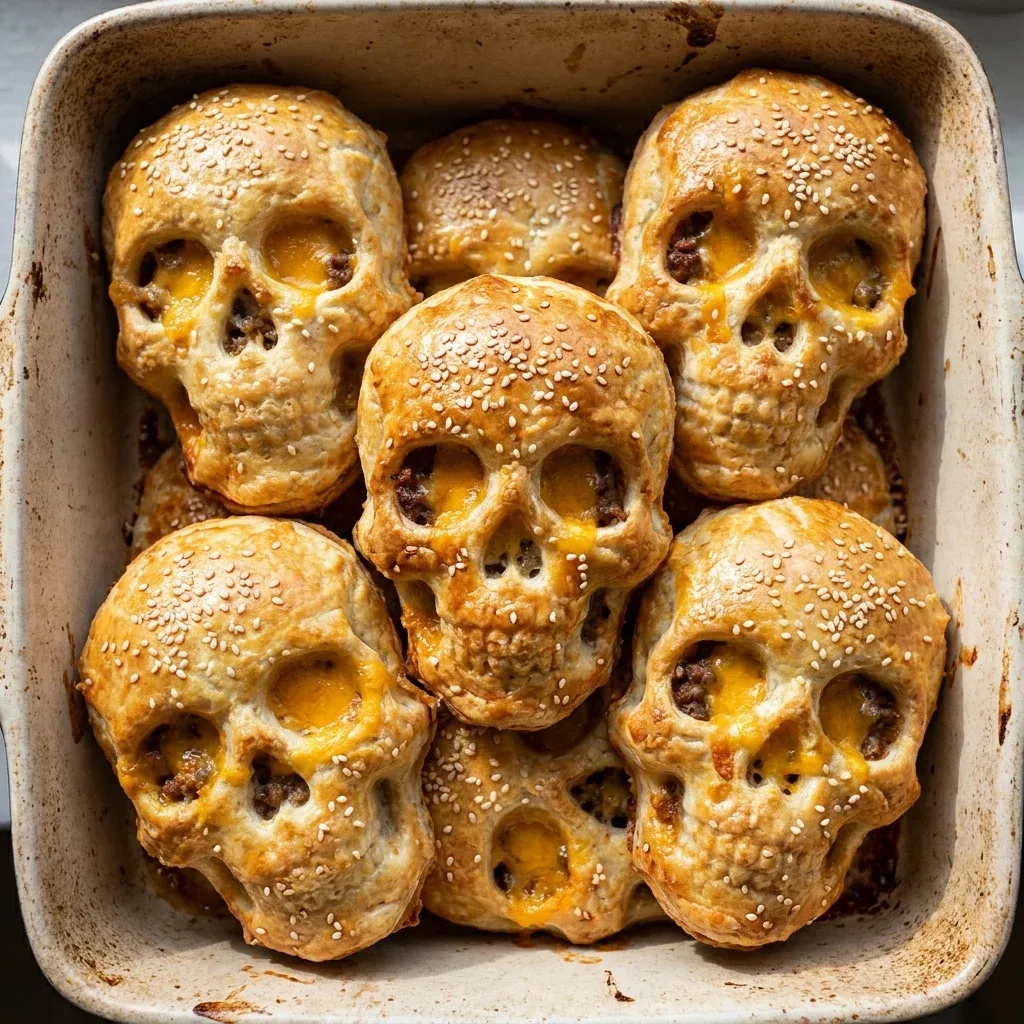
If you are looking for a fun, festive, and incredibly fast weeknight dinner, these Cheeseburger Skulls are your new secret weapon. I understand the pressure of a ticking clock, so I designed this recipe to deliver maximum impact with minimal effort. These savory treats feature juicy ground beef and gooey melted cheese tucked inside a perfectly golden, crisp crust.
You get all the nostalgic flavors of a classic burger without the mess of patties or a hot grill. Preparing Cheeseburger Skulls takes less than thirty minutes, making them ideal for busy professionals or parents on the go. This recipe turns a simple meal into a spooky masterpiece that tastes even better than it looks. Let’s dive into how you can get these Cheeseburger Skulls on your table tonight without breaking a sweat.
Why You’ll Love These Cheeseburger Skulls
- Speed and Efficiency: You can whip up a batch of Cheeseburger Skulls in just 30 minutes, keeping your evening stress-free.
- Crowd-Pleasing Flavor: These bites combine high-quality protein and savory cheese for a kid-friendly and adult-approved meal.
- Minimal Cleanup: Using a single pan for the filling and one skull mold means you spend less time at the sink and more time relaxing.
Ingredients You’ll Need
| Ingredient | Quantity | Notes |
| Lean Ground Beef | 1 lb | 90/10 lean for less grease and faster prep. |
| Refrigerated Pizza Dough | 2 tubes | Look for thin-crust varieties to save time. |
| Cheddar Cheese Cubes | 1 cup | Sharp cheddar provides the best flavor punch. |
| Diced Yellow Onion | 1/2 cup | Frozen pre-diced onions are a great shortcut. |
| Worcestershire Sauce | 1 tbsp | Adds a deep, savory umami base. |
| Garlic Powder | 1 tsp | Ensures even seasoning throughout the meat. |
| Salt and Black Pepper | To taste | Always season your beef well. |
| Egg Wash | 1 egg + 1 tsp water | For that beautiful golden-brown finish. |
| Sesame Seeds | Optional | Gives that authentic burger bun look. |
Substitutions & Variations
I am all about making recipes work for your specific lifestyle. If you want a leaner version of these Cheeseburger Skulls, simply swap the ground beef for ground turkey or lean ground chicken. You still get that satisfying meatiness but with less saturated fat.
For those watching their fiber intake, try using a whole-wheat pizza dough or even a low-carb cauliflower crust dough if you are feeling adventurous. You can also lighten up the cheese component by using a reduced-fat Swiss or a sharp white cheddar which offers more flavor per gram.
If you want to sneak in some veggies, finely minced mushrooms blend perfectly with the beef and add extra nutrients without changing the texture of your Cheeseburger Skulls. These simple swaps ensure your Cheeseburger Skulls fit your health goals while remaining delicious.
If you’re looking for a twist on your Cheeseburger Skulls, consider trying out our delicious recipe for Bacon Cheeseburger Alfredo Pasta. It offers a rich and creamy alternative that satisfies all the cheeseburger cravings while being quick to prepare.
Step-by-Step Instructions
- Preheat and Prep: Preheat your oven to 375°F (190°C). Generously spray your skull-shaped baking pan with non-stick cooking spray. This is a crucial step to ensure your Cheeseburger Skulls pop out easily.
- Cook the Filling: In a large skillet over medium-high heat, brown the ground beef and onions together. Use a spatula to break the meat into fine crumbles. Once the beef is no longer pink, drain any excess grease to keep the crust from getting soggy.
- Season: Stir in the Worcestershire sauce, garlic powder, salt, and pepper. Let the mixture cool for a few minutes so it does not tear the dough.
- Prepare the Dough: Unroll your pizza dough and cut it into squares large enough to line each skull cavity. Gently press the dough into the mold, leaving some overhang to seal the bottom.
- Assemble: Place a spoonful of the beef mixture into each cavity. Press a cube of cheddar cheese into the center of the meat, then top with another small spoonful of beef. Fold the overhanging dough over the filling and pinch the seams tightly to seal your Cheeseburger Skulls.
- Bake: Brush the tops (which will be the bottom of the skulls) with egg wash. Flip the pan over if it is double-sided, or just place it in the oven. Bake for 18-20 minutes or until the dough is golden brown and firm.
- Cool and Serve: Let the Cheeseburger Skulls rest in the pan for 5 minutes before carefully unmolding them onto a serving platter.
Pro Tips for Success
To achieve the best results with your Cheeseburger Skulls, make sure your meat filling is relatively dry. Excess moisture or grease is the enemy of a crisp crust. I always recommend using a colander to drain the beef thoroughly after browning.
Another tip is to avoid overstuffing. It is tempting to pack in as much meat as possible, but if the dough is too thin, it may burst during baking.
If you want those facial features to really pop, make sure you press the dough firmly into the details of the mold before adding the filling. Finally, use a dark-colored or heavy-duty metal mold for your Cheeseburger Skulls; these materials conduct heat better than silicone, giving you a superior crunch on the exterior.
To ensure perfect Cheeseburger Skulls, you might want to check out our Cheeseburger Casserole recipe. It provides great tips on managing moisture levels in your meat filling, which is crucial for achieving a crispy crust.
Storage & Reheating Tips
If you happen to have leftover Cheeseburger Skulls, they store beautifully in the refrigerator for up to three days. Place them in an airtight container once they have cooled completely. To maintain that “just-baked” texture, avoid the microwave if possible.
Instead, reheat your Cheeseburger Skulls in an air fryer at 350°F for about 4-5 minutes. This will crisp up the pizza dough while melting the cheese inside perfectly. If you are using a standard oven, wrap them loosely in foil and bake at 350°F for 10 minutes. These are fantastic for a quick grab-and-go lunch the next day!
What to Serve With This Recipe
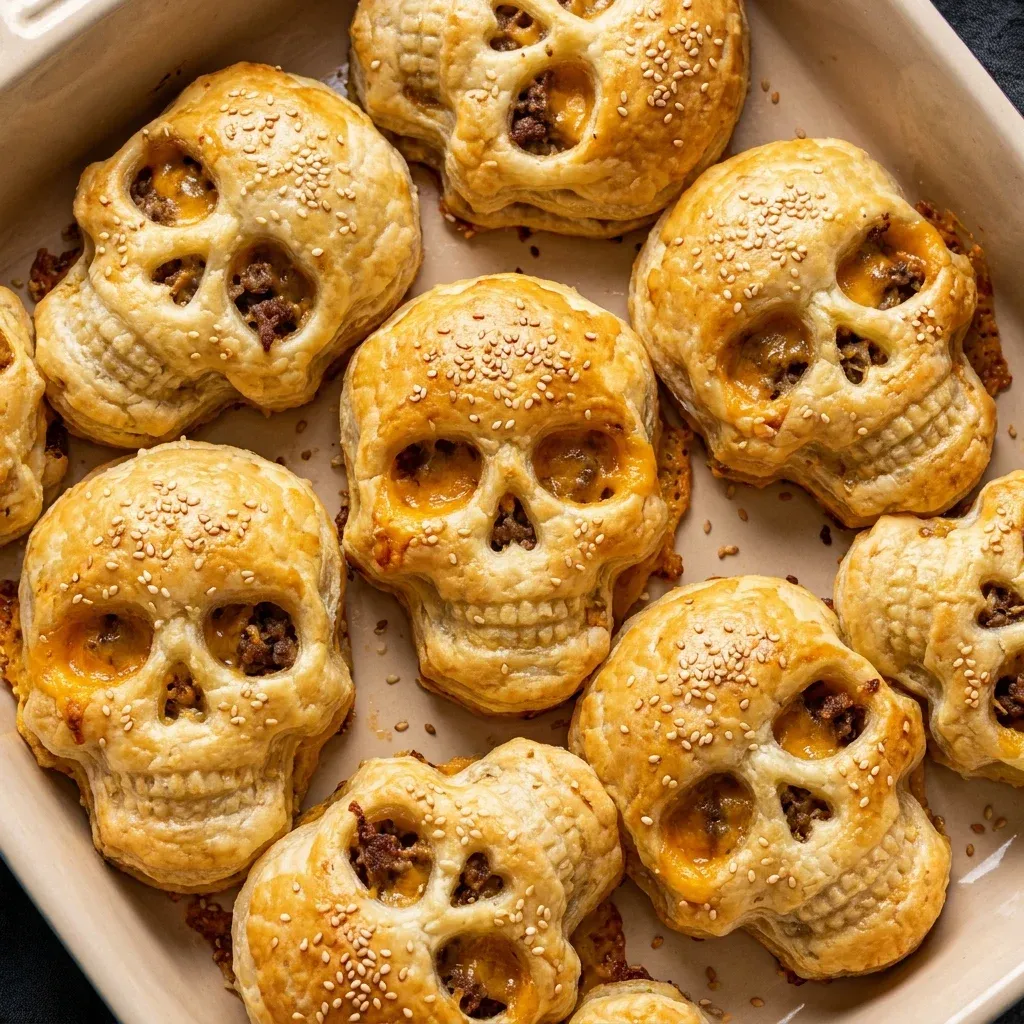
Since Cheeseburger Skulls are quite savory and decadent, I love balancing the plate with something fresh and bright. A crisp arugula salad with a lemon vinaigrette provides a nice acidic contrast to the rich beef and cheese. Roasted broccoli or asparagus spears also make excellent, low-effort sides that cook in roughly the same time as the skulls.
If you want to stay on theme for a party, serve these Cheeseburger Skulls with a “bloody” dipping sauce made of high-quality organic ketchup or a spicy sriracha mayo. Keeping the sides healthy ensures you feel energized rather than weighed down after your meal.
For a delightful complement to your Cheeseburger Skulls, consider pairing them with our Cheeseburger French Fry Bake. This dish captures similar flavors and helps create a cohesive meal that your guests will love.
FAQs
Can I make these Cheeseburger Skulls ahead of time?
Yes! You can prepare the beef filling up to two days in advance and keep it in the fridge. When you are ready to eat, simply assemble and bake. I do not recommend assembling the raw dough in the mold too far in advance, as the dough may become soggy.
Do I need a special pan for this recipe?
To get the specific skull shape, you will need a 3D skull cakelet pan or a similar molded pan. However, if you don’t have one, you can use the same ingredients to make “Cheeseburger Bundles” in a standard muffin tin. They will taste just as delicious!
Can I freeze Cheeseburger Skulls?
Absolutely. These Cheeseburger Skulls freeze exceptionally well. Flash-freeze them on a baking sheet first so they don’t stick together, then transfer them to a freezer bag.
They will stay fresh for up to two months. Reheat directly from frozen in the oven at 375°F for about 15-20 minutes.
Cheeseburger Skulls are a creative take on the classic American burger, merging fun and flavor for festive occasions. These unique treats are perfect for gatherings, and you can learn more about the origins of burgers in this informative article.
Nutrition Information (per serving)
This summary is based on one individual skull using lean beef and standard pizza dough.
| Metric | Amount |
| Calories | 320 kcal |
| Protein | 18g |
| Total Fat | 14g |
| Carbohydrates | 28g |
| Fiber | 1g |
| Sodium | 540mg |

Cheeseburger Skulls
- Total Time: 30 mins
- Yield: 8 servings 1x
- Diet: Gluten Free
Description
Cheeseburger Skulls are a fun and festive weeknight dinner featuring juicy ground beef and gooey melted cheese tucked inside a golden, crisp crust. They deliver all the nostalgic flavors of a classic burger in a novel shape while being quick to prepare and easy to clean up after.
Ingredients
1 lb Lean Ground Beef
2 tubes Refrigerated Pizza Dough
1 cup Cheddar Cheese Cubes
1/2 cup Diced Yellow Onio
1 tbsp Worcestershire Sauce
1 tsp Garlic Powder
Salt and Black Pepper to taste
1 Egg + 1 tsp Water for Egg Wash
Sesame Seeds (optional)
Instructions
- Preheat your oven to 375°F (190°C). Spray a skull-shaped baking pan with non-stick cooking spray
- In a large skillet over medium-high heat, brown the ground beef and onions together. Drain any excess grease
- Stir in Worcestershire sauce, garlic powder, salt, and pepper. Let cool
- Unroll pizza dough and cut into squares. Press dough into the mold
- Fill each cavity with a spoonful of beef, add a cube of cheese, then top with more beef. Pinch to seal
- Brush tops with egg wash. Bake for 18-20 minutes until golden brow
- Let cool for 5 minutes before unmolding
Notes
Ensure your beef is drained well to keep the crust from getting soggy.
Avoid overstuffing the skulls to prevent bursting.
- Prep Time: 10 mins
- Cook Time: 20 mins
- Category: Dinner
- Method: Baking
- Cuisine: American
Nutrition
- Serving Size: 1 skull
- Calories: 320 kcal
- Sugar: 1g
- Sodium: 540mg
- Fat: 14g
- Saturated Fat: 6g
- Unsaturated Fat: 7g
- Trans Fat: 0g
- Carbohydrates: 28g
- Fiber: 1g
- Protein: 18g
- Cholesterol: 40mg